Tableau défiler avec HTML et CSS
j'ai une table comme celle que je remplis avec une donnée
<table id="products-table"  style="overflow-y:scroll" >
    <thead>
        <tr>
            <th>Product (Parent Product)</th>
            <th>Associated Sites</th>
            <th>Actions</th>
        </tr>
    </thead>
    <tbody>
        @for (int i = 0; i < Model.Count(); i++)
        {
        <tr>
            <td>
                <a href="Edit"><strong>@Model.ElementAt(i).Name</strong></a><br />
            </td>
            <td>
                <span class="lesser"></span>
            </td>
            <td>@Html.ActionLink("Edit Product", "Edit", "Products")<br />
                @Html.ActionLink("Associate Site", "Associate", "Products")
            </td>
         </tr>
        }
        <tr>
</tbody>
</table>
et CSS comme ça
    #products-table
{
     width: 200px;
    height: 400px;
    overflow:scroll;
}
mais scroll ne fonctionne pas, je veux fixer la hauteur de la table et si elle dépasse, puis travailler avec scrollbar
8 réponses
Première Solution
<table cellspacing="0" cellpadding="0" border="0" width="325">
 <tr>
  <td>
   <table cellspacing="0" cellpadding="1" border="1" width="300" >
     <tr style="color:white;background-color:grey">
        <th>Header 1</th>
        <th>Header 2</th>
     </tr>
   </table>
  </td>
 </tr>
<tr>
<td>
   <div style="width:320px; height:60px; overflow:auto;">
     <table cellspacing="0" cellpadding="1" border="1" width="300" >
       <tr>
         <td>new item</td>
         <td>new item</td>
       </tr>
       <tr>
         <td>new item</td>
         <td>new item</td>
       </tr>
          <tr>
         <td>new item</td>
         <td>new item</td>
       </tr>
          <tr>
         <td>new item</td>
         <td>new item</td>
       </tr>
     </table>
   </div>
  </td>
 </tr>
</table>
résultat
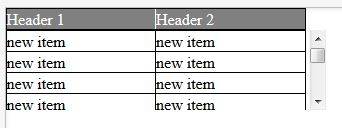
Cela fonctionne dans tous les navigateurs
Demo jsfiddle http://jsfiddle.net/nyCKE/6302 /
Deuxième Solution
c'est spécifique à votre Code seulement mais il pourrait avoir un problème avec IE9 donc je suggérerais la première Solution
#products-table
{
 width: 200px;
 height: 400px;
 overflow: auto;
}
ou Tableau avec en-tête fixe
tbody {
 width: 200px;
 height: 400px;
 overflow: auto;
}
résultat
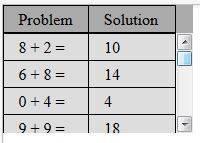
Demo jsfidle http://jsfiddle.net/nyCKE/7588 /
réponse Tardive, une autre idée, mais très court.
- mettre la table en div wrapper
- mettre le contenu des cellules d'en-tête dans div
- fixer l'en-tête contents , voir CSS
HTML
<div id="scrolltable">
    <table>
        <tr><th><div>first col</div></th><th><div>second</div></th></tr>
        <tr><td>foo</td><td>bar</td></tr>
        ... many rows ...
    </table>
</div>
CSS
#scrolltable { margin-top: 20px; height: 200px; overflow: auto; }
#scrolltable th div { position: absolute; margin-top: -20px; }
fonctionne seulement en Chrome, mais il peut être adapté à d'autres navigateurs modernes. Table des chutes retour à la table commune avec la barre de défilement dans d'autres brws. Utilise la propriété CSS3 FLEX.
<table border="1px" class="flexy">
    <caption>Lista Sumnjivih vozila:</caption>
    <thead>
        <tr>
            <td>Opis Sumnje</td>
        <td>Registarski<br>broj vozila</td>
        <td>Datum<br>Vreme</td>
        <td>Brzina<br>(km/h)</td>
        <td>Lokacija</td>
        <td>Status</td>
        <td>Akcija</td>
        </tr>
    </thead>
    <tbody>

        <tr>
        <td>Osumnjičen tranzit</td>
        <td>NS182TP</td>
        <td>23-03-2014 20:48:08</td>
        <td>11.3</td>
        <td>Raskrsnica kod pumpe<br></td>
        <td></td>
        <td>Prikaz</td>
        </tr>
        <tr>

        <tr>
        <td>Osumnjičen tranzit</td>
        <td>NS182TP</td>
        <td>23-03-2014 20:48:08</td>
        <td>11.3</td>
        <td>Raskrsnica kod pumpe<br></td>
        <td></td>
        <td>Prikaz</td>
        </tr>
        <tr>

        <tr>
        <td>Osumnjičen tranzit</td>
        <td>NS182TP</td>
        <td>23-03-2014 20:48:08</td>
        <td>11.3</td>
        <td>Raskrsnica kod pumpe<br></td>
        <td></td>
        <td>Prikaz</td>
        </tr>
        <tr>


        <tr>
        <td>Osumnjičen tranzit</td>
        <td>NS182TP</td>
        <td>23-03-2014 20:48:08</td>
        <td>11.3</td>
        <td>Raskrsnica kod pumpe<br></td>
        <td></td>
        <td>Prikaz</td>
        </tr>

    </tbody>
</table>
Style (CSS 3):
caption {
    display: block;
    line-height: 3em;
    width: 100%;
    -webkit-align-items: stretch;
    border: 1px solid #eee;
}

       .flexy {
            display: block;
            width: 90%;
            border: 1px solid #eee;
            max-height: 320px;
            overflow: auto;
        }

        .flexy thead {
            display: -webkit-flex;
            -webkit-flex-flow: row;
        }

        .flexy thead tr {
            padding-right: 15px;
            display: -webkit-flex;
            width: 100%;
            -webkit-align-items: stretch;
        }

        .flexy tbody {
            display: -webkit-flex;
            height: 100px;
            overflow: auto;
            -webkit-flex-flow: row wrap;
        }
        .flexy tbody tr{
            display: -webkit-flex;
            width: 100%;
        }

        .flexy tr td {
            width: 15%;
        }
pour ceux qui se demandent comment implémenter la solution de Garry avec plus d'un en-tête c'est ici:
#wrapper {
  width: 235px;
}

table {
  border: 1px solid black;
  width: 100%;
}

th,
td {
  width: 100px;
  border: 1px solid black;
}

thead>tr {
  position: relative;
  display: block;
}

tbody {
  display: block;
  height: 80px;
  overflow: auto;
}
<div id="wrapper">
<table>
<thead>
<tr>
<th>column1</th>
<th>column2</th>
</tr>
</thead>
<tbody>
<tr>
<td>row1</td>
<td>row1</td>
</tr>
<tr>
<td>row2</td>
<td>row2</td>
</tr>
<tr>
<td>row3</td>
<td>row3</td>
</tr>
<tr>
<td>row4</td>
<td>row4</td>
</tr>
</tbody>
</table>
</div>Pour ce qu'il vaut maintenant: voici encore une autre solution:
- créer deux divs dans un
display: inline-block - dans le premier div, mettre une table avec seulement l'en-tête (header table
tabhead) - dans le 2ème div, mettre une table avec en-tête et données (table de données / table complète
tabfull) - utiliser JavaScript, utiliser
setTimeout(() => {/*...*/})pour exécuter le code après le rendu / après avoir rempli la table avec les résultats defetch - mesurer la largeur de chaque th dans la table de données (en utilisant
clientWidth) - appliquer la même largeur à la contrepartie dans la table d'en-tête
- définit la visibilité de l'en-tête de la table de données à caché et fixe la marge supérieure à -1 * hauteur de la table de données thead pixels
avec quelques retouches, c'est la méthode à utiliser (pour brièveté / simplicité, j'ai utilisé d3js, le les mêmes opérations peuvent être effectuées en utilisant le DOM simple):
setTimeout(() => { // pass one cycle
  d3.select('#tabfull')
    .style('margin-top', (-1 * d3.select('#tabscroll').select('thead').node().getBoundingClientRect().height) + 'px')
    .select('thead')
      .style('visibility', 'hidden');
  let widths=[]; // really rely on COMPUTED values
  d3.select('#tabfull').select('thead').selectAll('th')
    .each((n, i, nd) => widths.push(nd[i].clientWidth));
  d3.select('#tabhead').select('thead').selectAll('th')
    .each((n, i, nd) => d3.select(nd[i])
          .style('padding-right', 0)
          .style('padding-left', 0)
          .style('width', widths[i]+'px'));
})
Waiting on render cycle a l'avantage d'utiliser le moteur de mise en page du navigateur tout au long du processus - pour tout type d'en-tête; il n'est pas lié à une condition spéciale ou des longueurs de contenu de cellules étant en quelque sorte similaire. Il s'ajuste également correctement pour les barres de défilement visibles (comme sur Windows)
j'ai mis en place un codepen avec un exemple complet ici: https://codepen.io/sebredhh/pen/QmJvKy
ajoute un gradient de décoloration à un élément de table HTML débordant pour mieux indiquer qu'il y a plus de contenu à défiler.
- Tableau avec en-tête fixe
- Dépassement de défilement dégradé "151960920 Personnalisé" barre de défilement
voir l'exemple en direct ci-dessous:
$("#scrolltable").html("<table id='cell'><tbody></tbody></table>");
$("#cell").append("<thead><tr><th><div>First col</div></th><th><div>Second col</div></th></tr></thead>");

for (var i = 0; i < 40; i++) {
  $("#scrolltable > table > tbody").append("<tr><td>" + "foo" + "</td><td>" + "bar" + "</td></tr>");
}
/* Table with fixed header */
table,
thead {
width: 100%;
text-align: left;
}
#scrolltable {
margin-top: 50px;
height: 120px;
overflow: auto;
width: 200px;
}
#scrolltable table {
border-collapse: collapse;
}
#scrolltable tr:nth-child(even) {
background: #EEE;
}
#scrolltable th div {
position: absolute;
margin-top: -30px;
}
/* Custom scrollbar */
::-webkit-scrollbar {
width: 8px;
}
::-webkit-scrollbar-track {
box-shadow: inset 0 0 6px rgba(0, 0, 0, 0.3);
border-radius: 10px;
}
::-webkit-scrollbar-thumb {
border-radius: 10px;
box-shadow: inset 0 0 6px rgba(0, 0, 0, 0.5);
}
/* Overflow scroll gradient */
.overflow-scroll-gradient {
position: relative;
}
.overflow-scroll-gradient::after {
content: '';
position: absolute;
bottom: 0;
width: 240px;
height: 25px;
background: linear-gradient( rgba(255, 255, 255, 0.001), white);
pointer-events: none;
}<script src="https://ajax.googleapis.com/ajax/libs/jquery/2.1.1/jquery.min.js"></script>
<div class="overflow-scroll-gradient">
<div id="scrolltable">
</div>
</div>ce travail pour moi
Demo: jsfiddle
$(function()
{
    Fixed_Header();
});
function Fixed_Header()
{
    $('.User_Table thead').css({'position': 'absolute'});
    $('.User_Table tbody tr:eq("2") td').each(function(index,e){
        $('.User_Table thead tr th:eq("'+index+'")').css({'width' : $(this).outerWidth() +"px" });
    });
    var Header_Height = $('.User_Table thead').outerHeight();
    $('.User_Table thead').css({'margin-top' : "-"+Header_Height+"px"});
    $('.User_Table').css({'margin-top' : Header_Height+"px"});
}
<div style="overflow:auto">
    <table id="table2"></table>
</div>
essayez ce code pour la table de débordement il ne fonctionnera que sur la balise div