Tiroir De Navigation Sous La Barre D'Outils
j'essaie d'ouvrir le tiroir de navigation sous la barre d'outils.
<android.support.v4.widget.DrawerLayout
xmlns:android="http://schemas.android.com/apk/res/android"
xmlns:tools="http://schemas.android.com/tools"
android:layout_width="match_parent"
android:layout_height="match_parent"
android:id="@+id/drawer_layout"
tools:context=".MainActivity">
<RelativeLayout
    android:layout_width = "match_parent"
    android:layout_height = "wrap_content">
    <include layout="@layout/toolbar"
        android:id="@+id/toolbar"/>
    <FrameLayout
        android:layout_below="@+id/toolbar"
        android:layout_width="match_parent"
        android:layout_height="match_parent"
        android:background="@color/background_color"/>
</RelativeLayout>
<ListView
    android:id="@+id/drawer"
    android:layout_width="260dp"
    android:layout_height="match_parent"
    android:layout_below="@+id/toolbar"
    android:layout_marginTop="56dp"
    android:layout_gravity="start">
</ListView>
</android.support.v4.widget.DrawerLayout>
comment reformater le xml pour que la barre de navigation s'ouvre sous la barre d'outils?
7 réponses
Vous devez déplacer DrawerLayout en tant que société mère et se déplacer Toolbar de DrawerLayout conteneur de contenu.
En bref cela ressemble à:
RelativeLayout
 ----Toolbar
 ----DrawerLayout
     ---ContentView
     ---DrawerList
<RelativeLayout xmlns:android="http://schemas.android.com/apk/res/android"
    xmlns:tools="http://schemas.android.com/tools"
    android:id="@+id/top_parent"
    android:layout_width="match_parent"
    android:layout_height="match_parent"
    android:fitsSystemWindows="true"
    tools:context=".MainActivity">

    <include
        android:id="@+id/toolbar"
        layout="@layout/toolbar" />

    <android.support.v4.widget.DrawerLayout
        android:id="@+id/drawer_layout"
        android:layout_width="match_parent"
        android:layout_height="match_parent"
        android:layout_below="@+id/toolbar">

        <FrameLayout
            android:id="@+id/content_frame"
            android:layout_width="match_parent"
            android:layout_height="match_parent"
            android:background="@color/background_color" />

        <ListView
            android:id="@+id/drawer"
            android:layout_width="260dp"
            android:layout_height="match_parent"
            android:layout_below="@+id/toolbar"
            android:layout_gravity="start"
            android:layout_marginTop="56dp" />

    </android.support.v4.widget.DrawerLayout>
</RelativeLayout>
toutefois, les lignes directrices sur la conception des matériaux précisent que le tiroir de Navigation doit être au-dessus du Toolbar .
vous devez simplement ajouter
android:layout_marginTop="@dimen/abc_action_bar_default_height_material"
à votre disposition que vous utilisez, comme un tiroir.
cela réglera automatiquement le tiroir de navigation sous la barre d'outils et supporte également différentes tailles d'écran.
vous pouvez ajouter layout_marginTop comme ceci,
<android.support.design.widget.NavigationView
        android:layout_marginTop="@dimen/abc_action_bar_default_height_material"
        android:id="@+id/nav_view"
        android:layout_width="wrap_content"
        android:layout_height="match_parent"
        android:layout_gravity="start"
        android:fitsSystemWindows="true"
        app:headerLayout="@layout/nav_header_main"
        app:menu="@menu/activity_main_drawer" />
mais de tiroir apparaît comme la couche supérieure de la barre d'outils.
Voici une autre façon hachée de l'Ajouter ci-dessous à la barre d'outils!!!
peut-être pas le meilleur, mais il fonctionne!
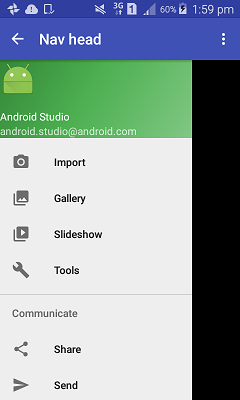
résultat final ressemblera à ceci
si vous créez un projet comme projet de tiroir de Navigation( Navigation Drawer Activity ) il vous donnera quatre fichiers XML à la création dans votre layout dossier
- app_bar_main
- content_main
- navigatin_main
-
activity_main
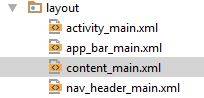
comment ces XML sont-ils reliés? la plupart du temps, je vois include tag est utilisé pour
votre activité est liée à activity_main
-
activity_maina leapp_bar_mainetnavigation_view(tiroir) -
app_bar_maina letoolbaretcontent_mainpar défaut
permet maintenant de supprimer activity_main et réglez son contenu directement sur app bar main et utilisez-le comme la mise en page principale pour L'activité.
Pour ajouter le tiroir sous la barre d'outils
ajoutez-le sous le android.support.design.widget.AppBarLayout parce que is contient la barre d'outils et son devrait être sur le dessus.
voici un exemple d'app_bar_main.XML
      <?xml version="1.0" encoding="utf-8"?>
<android.support.design.widget.CoordinatorLayout xmlns:android="http://schemas.android.com/apk/res/android"
    xmlns:app="http://schemas.android.com/apk/res-auto"
    xmlns:tools="http://schemas.android.com/tools"
    android:layout_width="match_parent"
    android:layout_height="match_parent"
    android:fitsSystemWindows="true"
    tools:context="none.navhead.MainActivity">

    <android.support.design.widget.AppBarLayout
        android:layout_width="match_parent"
        android:layout_height="wrap_content"
        android:theme="@style/AppTheme.AppBarOverlay">

        <android.support.v7.widget.Toolbar
            android:id="@+id/toolbar"
            android:layout_width="match_parent"
            android:layout_height="?attr/actionBarSize"
            android:background="?attr/colorPrimary"
            app:popupTheme="@style/AppTheme.PopupOverlay" />

    </android.support.design.widget.AppBarLayout>


    //------ taken from activity_main
    // content main
    <include layout="@layout/content_main" />

    // you need this padding
    <android.support.v4.widget.DrawerLayout
        android:paddingTop="?attr/actionBarSize"
        android:id="@+id/drawer_layout"
        android:layout_width="match_parent"
        android:layout_height="match_parent"
        tools:openDrawer="start">

        <android.support.design.widget.NavigationView
            android:id="@+id/nav_view"
            android:layout_width="wrap_content"
            android:layout_height="match_parent"
            android:layout_gravity="start"
            android:fitsSystemWindows="true"
            app:headerLayout="@layout/nav_header_main"
            app:menu="@menu/activity_main_drawer" />

    </android.support.v4.widget.DrawerLayout>


</android.support.design.widget.CoordinatorLayout>
p. s vous pouvez définir app_bar_main.XML pour définir le contenu de votre activité il suffit de jouer autour il ya beaucoup de façons ;)
c'est ma présentation et travail parfait: activity_main:
<?xml version="1.0" encoding="utf-8"?>
<android.support.design.widget.CoordinatorLayout xmlns:android="http://schemas.android.com/apk/res/android"
    xmlns:app="http://schemas.android.com/apk/res-auto"
    xmlns:tools="http://schemas.android.com/tools"
    android:layout_width="match_parent"
    android:layout_height="match_parent">
    <!-- AppBarLayout should be here -->
    <android.support.design.widget.AppBarLayout
        android:layout_width="match_parent"
        android:layout_height="wrap_content"
        android:theme="@style/AppTheme.AppBarOverlay">

        <android.support.v7.widget.Toolbar
            android:id="@+id/toolbar"
            android:layout_width="match_parent"
            android:layout_height="?attr/actionBarSize"
            android:background="?attr/colorPrimary"
            app:popupTheme="@style/AppTheme.PopupOverlay" />
    </android.support.design.widget.AppBarLayout>

    <!-- add app:layout_behavior="@string/appbar_scrolling_view_behavior" -->

    <android.support.v4.widget.DrawerLayout
        android:id="@+id/drawer_layout"
        android:layout_width="match_parent"
        android:layout_height="match_parent"
        android:fitsSystemWindows="true"
        app:layout_behavior="@string/appbar_scrolling_view_behavior"
        tools:openDrawer="start">

        <include
            layout="@layout/app_bar_main"
            android:layout_width="match_parent"
            android:layout_height="match_parent" />

        <android.support.design.widget.NavigationView
            android:id="@+id/nav_view"
            android:layout_width="wrap_content"
            android:layout_height="match_parent"
            android:layout_gravity="start"
            android:fitsSystemWindows="true"
            app:headerLayout="@layout/nav_header_main"
            app:menu="@menu/activity_main_drawer" />
    </android.support.v4.widget.DrawerLayout>
</android.support.design.widget.CoordinatorLayout>
app_bar_main.xml:
<?xml version="1.0" encoding="utf-8"?>
<FrameLayout
  xmlns:android="http://schemas.android.com/apk/res/android"
  xmlns:app="http://schemas.android.com/apk/res-auto"
  xmlns:tools="http://schemas.android.com/tools"
  android:layout_width="match_parent"
  android:layout_height="match_parent"
  android:fitsSystemWindows="true"
  tools:context=".activty.MainActivity">
<include layout="@layout/content_main"/>
</FrameLayout>
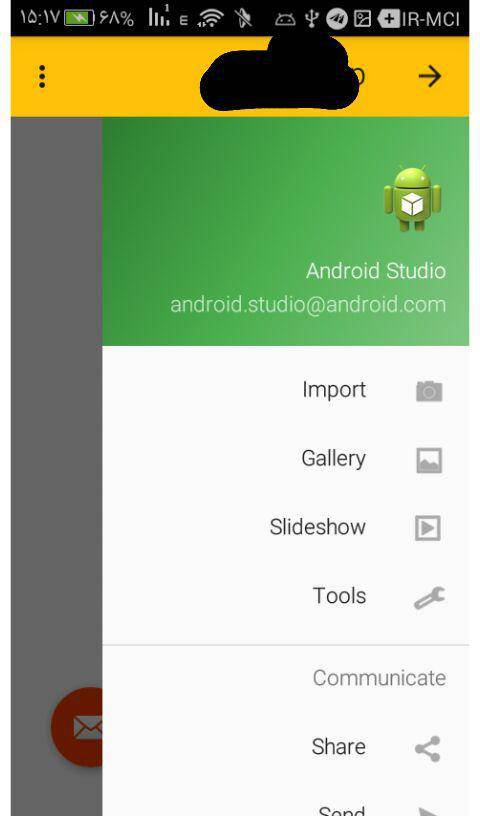
résultat: Barre d'outils en forme de cloche 151930920"
<?xml version="1.0" encoding="utf-8"?>
<android.support.v4.widget.DrawerLayout
xmlns:android="http://schemas.android.com/apk/res/android"
    xmlns:app="http://schemas.android.com/apk/res-auto"
    xmlns:tools="http://schemas.android.com/tools"
    android:id="@+id/drawer_layout"
    android:layout_width="match_parent"
    android:layout_height="match_parent"
    android:fitsSystemWindows="false"
    tools:openDrawer="start">
    <include
        layout="@layout/app_bar_main"
        android:layout_width="match_parent"
        android:layout_height="match_parent" />
    <android.support.design.widget.NavigationView
        android:layout_marginTop="?attr/actionBarSize"
        android:id="@+id/nav_view"
        android:layout_width="wrap_content"
        android:layout_height="match_parent"
        android:layout_gravity="start"
        android:fitsSystemWindows="false"
        app:menu="@menu/activity_main_drawer" />
</android.support.v4.widget.DrawerLayout>
si vous utilisez une barre d'outils personnalisée, utilisez la disposition des tiroirs de cette façon..
<LinearLayout xmlns:android="http://schemas.android.com/apk/res/android"
xmlns:app="http://schemas.android.com/apk/res-auto"
android:orientation="vertical"
android:layout_width="match_parent"
android:layout_height="match_parent"
android:orientation="vertical">

    <!-- The toolbar -->
    <android.support.v7.widget.Toolbar
        android:id="@+id/my_awesome_toolbar"
        android:layout_height="wrap_content"
        android:layout_width="match_parent"
        android:minHeight="?attr/actionBarSize"
        android:background="?attr/colorPrimary" />

    <android.support.v4.widget.DrawerLayout
    xmlns:android="http://schemas.android.com/apk/res/android"
    android:id="@+id/my_drawer_layout"
    android:layout_width="match_parent"
    android:layout_height="match_parent">

        <!-- drawer view -->
        <LinearLayout
            android:layout_width="304dp"
            android:layout_height="match_parent"
            android:layout_gravity="left|start">
            ....
        </LinearLayout>

    </android.support.v4.widget.DrawerLayout>

</LinearLayout>
et si vous n'utilisez pas la barre d'outils personnalisée, vous devez placer la marge en haut de la disposition du tiroir..
android:layout_marginTop ="?android:attr/actionBarSize"
une solution facile et bonne est définie fitsSystemWindows=false pour
android.support.v4.widget.DrawerLayout
id
android:id="@+id/drawer_layout"
et pour navigationView set layout_marginTop comme ?attr/actionBarSize qui obtiendraient la taille de la barre d'action et la réglerait comme marge
voici le code complet de activity_main.xml qui a les deux changements énumérés ci-dessus.