Image Bitmap avec coins arrondis avec trait
j'ai une image avec des arêtes vives. 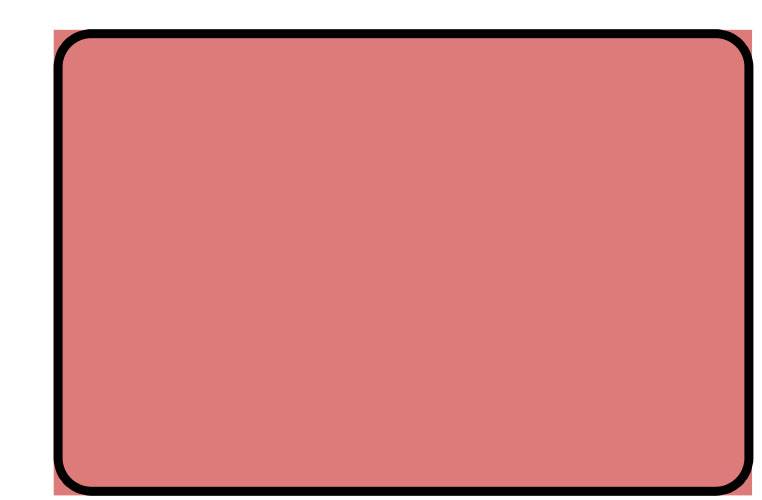
le tile_mode.xml
<?xml version="1.0" encoding="utf-8"?>
<bitmap xmlns:android="http://schemas.android.com/apk/res/android"
    android:src="@drawable/background"
    android:tileMode="repeat">
</bitmap>
le dos.xml
<?xml version="1.0" encoding="UTF-8"?>
<layer-list xmlns:android="http://schemas.android.com/apk/res/android">
       <item android:drawable="@drawable/tile_mode" />
    <item>
        <shape>
            <solid/>
            <stroke android:width="1dip" android:color="#225786" />
            <corners android:radius="10dip"/>
            <padding android:left="0dip" android:top="0dip" android:right="0dip" android:bottom="0dip" />
        </shape>
    </item>
mise en page.xml
<LinearLayout
                android:id="@+id/frame1"
                android:background="@drawable/back"
                android:layout_width="fill_parent"
                android:layout_height="wrap_content">
            </LinearLayout>
je mets l'image comme arrière-plan à cette mise en page et je dessine une bordure à elle, mais le problème est que l'image est carrée avec des arêtes vives et la bordure que je dessine dans le xml est des coins arrondis. Alors, comment faire de l'image aussi, avec des coins arrondis?
8 réponses
il s'agit d'une de solution dans laquelle vous devez make round to your main layout background et à l'intérieur de garder votre imageview with your desire image:
quelque chose comme ci-dessous:
arrière.xml
Cela rendra votre image aux coins ronds
<?xml version="1.0" encoding="UTF-8"?>
<shape xmlns:android="http://schemas.android.com/apk/res/android" android:shape="rectangle">
     <stroke android:width="1dp" android:color="#dd7b7a"/>
     <corners android:bottomRightRadius="10dp" android:bottomLeftRadius="10dp"
     android:topLeftRadius="10dp" android:topRightRadius="10dp"/>
     <solid android:color="#dd7b7a"/>
 </shape>
tile_mode.xml
<?xml version="1.0" encoding="utf-8"?>
<bitmap xmlns:android="http://schemas.android.com/apk/res/android"
android:src="@drawable/background"
android:tileMode="repeat" />
mise en page.xml
<?xml version="1.0" encoding="utf-8"?>
<LinearLayout xmlns:android="http://schemas.android.com/apk/res/android"
    android:orientation="vertical"
    android:layout_width="fill_parent"
    android:layout_height="fill_parent"
    android:gravity="center"
    >
<LinearLayout
     android:padding="4dip"
    android:orientation="vertical"
    android:layout_width="wrap_content"
    android:layout_height="wrap_content"
    android:background="@drawable/back"
    android:gravity="center_horizontal"
    >
<LinearLayout
    android:layout_width="wrap_content"
    android:layout_height="wrap_content"
   android:background="@drawable/tile_mode"
    />
</LinearLayout>
</LinearLayout>
mise à Jour
après avoir creusé des lots, je suis tombé sur la solution qui déjà affiché sur stackoverflow
changer L'Image comme coin arrondi
Comment faire un ImageView avoir des coins arrondis
etape 1@
principal.xml
 <RelativeLayout xmlns:android="http://schemas.android.com/apk/res/android"
        xmlns:tools="http://schemas.android.com/tools"
        android:layout_width="match_parent"
        android:layout_height="match_parent"
        android:gravity="center"
        tools:context=".MainActivity" >

        <ImageView
            android:id="@+id/image"
            android:layout_width="wrap_content"
            android:layout_height="wrap_content"
            android:layout_centerHorizontal="true"

          />

    </RelativeLayout>
Etape 2@
faire une fonction qui fait arrondi à votre bitmap en utilisant la toile.
public static Bitmap getRoundedCornerBitmap(Bitmap bitmap, int pixels) {
        Bitmap output = Bitmap.createBitmap(bitmap.getWidth(), bitmap
                .getHeight(), Config.ARGB_8888);
        Canvas canvas = new Canvas(output);

        final int color = 0xff424242;
        final Paint paint = new Paint();
        final Rect rect = new Rect(0, 0, bitmap.getWidth(), bitmap.getHeight());
        final RectF rectF = new RectF(rect);
        final float roundPx = pixels;

        paint.setAntiAlias(true);
        canvas.drawARGB(0, 0, 0, 0);
        paint.setColor(color);
        canvas.drawRoundRect(rectF, roundPx, roundPx, paint);

        paint.setXfermode(new PorterDuffXfermode(Mode.SRC_IN));
        canvas.drawBitmap(bitmap, rect, rect, paint);

        return output;
    }
etape 3@
public class MainActivity extends Activity {

    @Override
    protected void onCreate(Bundle savedInstanceState) {
        super.onCreate(savedInstanceState);
        setContentView(R.layout.main);
        ImageView image=(ImageView)findViewById(R.id.image);


        Bitmap bitmap = BitmapFactory.decodeResource(getResources(), R.drawable.testing);


    image.setImageBitmap(getRoundedCornerBitmap(bitmap, 20));
la réponse de RobinHood a fonctionné pour moi avec un changement dû à une erreur que je recevais au sujet de l'affectation variable.
j'ai dû changer la ligne:
paint.setXfermode(new PorterDuffXfermode(Mode.SRC_IN));
sur cette ligne:
paint.setXfermode(new PorterDuffXfermode(PorterDuff.Mode.SRC_IN));
de Faire mon code complet:
public class MainActivity extends Activity {

@Override
protected void onCreate(Bundle savedInstanceState) {
    super.onCreate(savedInstanceState);

    requestWindowFeature(Window.FEATURE_NO_TITLE);
    this.getWindow().setFlags(WindowManager.LayoutParams.FLAG_FULLSCREEN,WindowManager.LayoutParams.FLAG_FULLSCREEN);

    setContentView(R.layout.activity_main);

    TextView textViewTitle = (TextView) findViewById(R.id.MYTEXTIDHERE);
    textViewTitle.setText("Some Text");

    ImageButton imageButtonSetter = (ImageButton) findViewById(R.id.MYIMAGEIDHERE);
    Bitmap myBitmap = BitmapFactory.decodeResource(getResources(), R.drawable.MYIMAGENAMEHERE);
    imageButtonSetter.setImageBitmap(getRoundedCornerBitmap(myBitmap, 40));
}

public static Bitmap getRoundedCornerBitmap(Bitmap bitmap, int pixels) {
    Bitmap output = Bitmap.createBitmap(bitmap.getWidth(), bitmap
            .getHeight(), Config.ARGB_8888);
    Canvas canvas = new Canvas(output);

    final int color = 0xff424242;
    final Paint paint = new Paint();
    final Rect rect = new Rect(0, 0, bitmap.getWidth(), bitmap.getHeight());
    final RectF rectF = new RectF(rect);
    final float roundPx = pixels;

    paint.setAntiAlias(true);
    canvas.drawARGB(0, 0, 0, 0);
    paint.setColor(color);
    canvas.drawRoundRect(rectF, roundPx, roundPx, paint);
    paint.setXfermode(new PorterDuffXfermode(PorterDuff.Mode.SRC_IN));
    canvas.drawBitmap(bitmap, rect, rect, paint);

    return output;
}
en fait, il y a une bibliothèque que j'ai faite qui répond exactement à vos besoins, et vous n'avez pas à vous soucier de ces fichiers xml.
https://github.com/pungrue26/SelectableRoundedImageView
avec ce projet open-source, vous pouvez placer des rayons différents sur chaque coin, et définir des bordures (largeur et couleurs) , et ainsi de suite. comme ci-dessous. J'espère que ça peut vous aider.

OK essayons par dessous
     <?xml version="1.0" encoding="utf-8"?>
 <shape
    android:shape="rectangle" xmlns:android="http://schemas.android.com/apk/res/android">
    <corners android:radius="30dp"/>
    <stroke android:width="2dp" android:color="#000000"/>
</shape>

<LinearLayout
    android:id="@+id/frame1"
    android:background="@drawable/corner_background"
    android:layout_width="fill_parent"
    android:layout_height="wrap_content"
    android:padding="5dp"
    >
    <ImageView
    android:layout_width="wrap_content"
    android:layout_height="wrap_content"
    android:src="@drawable/background"
    />
</LinearLayout>
essayez votre dos.xml quelque chose comme ça.
<?xml version="1.0" encoding="UTF-8"?>

<shape xmlns:android="http://schemas.android.com/apk/res/android" android:shape="rectangle">
<solid android:color="#ffffffff"/>

<stroke android:width="3dp"
        android:color="#ff000000"
        />

<padding android:left="1dp"
         android:top="1dp"
         android:right="1dp"
         android:bottom="1dp"
         />

<corners android:bottomRightRadius="7dp" android:bottomLeftRadius="7dp"
 android:topLeftRadius="7dp" android:topRightRadius="7dp"/>
</shape>
j'ai eu un problème similaire aujourd'hui que mon image était une carte de Google. vous devez en fait Cacher les Coins et la façon de le faire est de créer un 9Patch comme le suivant:

et de l'appliquer comme un arrière-plan sur toute votre mise en page ou une autre mise en page couvrant votre mise en page. Pour plus d'informations, consultez le lien suivant:
Est-il un moyen de mettre en œuvre des coins arrondis pour une Mapfragment?
je suis allé actully à ce site: http://www.sumopaint.com/app/
et peint tout à la main, vous pouvez prendre mon exemple et modifier les couleurs à votre goût.
vous aurez probablement besoin de la prochaine:

vous pouvez obtenir plus d'informations sur la façon de créer 9patch dans les liens suivants:
<?xml version="1.0" encoding="utf-8"?>
<item>
    <bitmap
        android:src="@drawable/bg_striped_img"
        android:tileMode="repeat" />
</item>
<item android:left="-20dp" android:top="-20dp" android:right="-20dp" android:bottom="-20dp">
    <shape android:shape="oval" >
        <stroke
            android:width="20dp"
            android:color="#ffffffff" />

        <solid android:color="#00000000" />

        <size
            android:height="120dp"
            android:width="120dp" />
    </shape>
</item>

    <item >
    <shape android:shape="oval" >
        <stroke
            android:width="1dp"
            android:color="#ff999999" />

        <solid android:color="#00000000" />

        <size
            android:height="120dp"
            android:width="120dp" />
    </shape>
</item>
passer bitmap original à la fonction suivante et vous obtiendrez un bitmap arrondi comme résultat:). Espérons que cela aide quelqu'un.
 public Bitmap getRoundedBitmap(Bitmap bitmap) {
        Bitmap resultBitmap;
        int originalWidth = bitmap.getWidth();
        int originalHeight = bitmap.getHeight();
        float r;

        if (originalWidth > originalHeight) {
            resultBitmap = Bitmap.createBitmap(originalHeight, originalHeight,
                    Bitmap.Config.ARGB_8888);
            r = originalHeight / 2;
        } else {
            resultBitmap = Bitmap.createBitmap(originalWidth, originalWidth,
                    Bitmap.Config.ARGB_8888);
            r = originalWidth / 2;
        }

        Canvas canvas = new Canvas(resultBitmap);

        final Paint paint = new Paint();
        final Rect rect = new Rect(ConstsCore.ZERO_INT_VALUE,
                ConstsCore.ZERO_INT_VALUE, originalWidth, originalHeight);

        paint.setAntiAlias(true);
        canvas.drawARGB(ConstsCore.ZERO_INT_VALUE, ConstsCore.ZERO_INT_VALUE,
                ConstsCore.ZERO_INT_VALUE, ConstsCore.ZERO_INT_VALUE);
        canvas.drawCircle(r, r, r, paint);
        paint.setXfermode(new PorterDuffXfermode(PorterDuff.Mode.SRC_IN));
        canvas.drawBitmap(bitmap, rect, rect, paint);

        return resultBitmap;
    }